Change Nameserver
Bloggers are facing 3 different situation while changing nameserver for Ezoic. Read carefully and follow the situation where you are in.
Situation 1: Hosting and Domain in same register
If your domain and hosting is in same register and want to change nameserver then just navigate to the website DNS section and replace the ezoic nameserver with exiting one.
My domain and hosting is in Hostinger. I will go step by step. You can find similar dashboard on other hosting also.
Step 1: Log in to Hostinger Hpanel and go to Domains menu
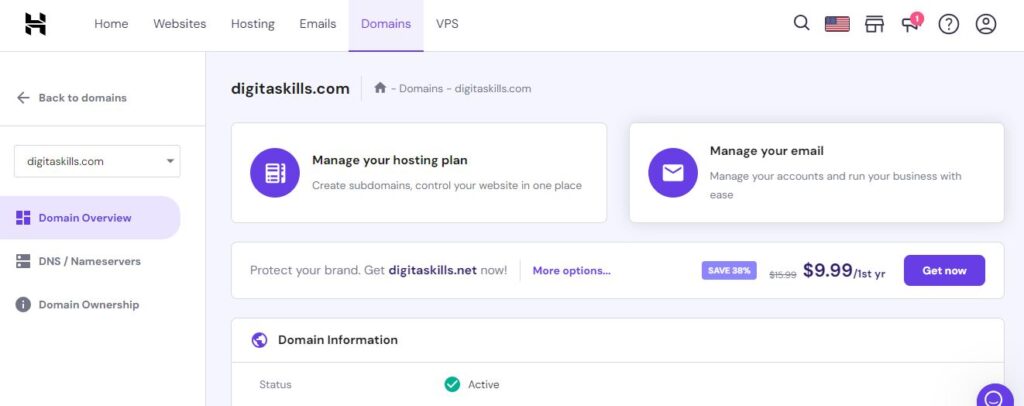
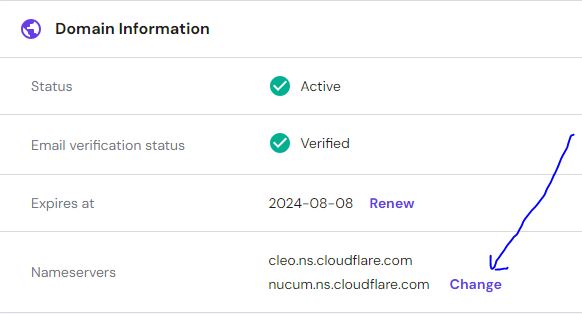
Step 2: Scroll down to Domain Information > Nameservers > Change
Step 3: From Select Nameservers section choose Change nameservers and replace the existing nameserver with the ezoic nameserver.
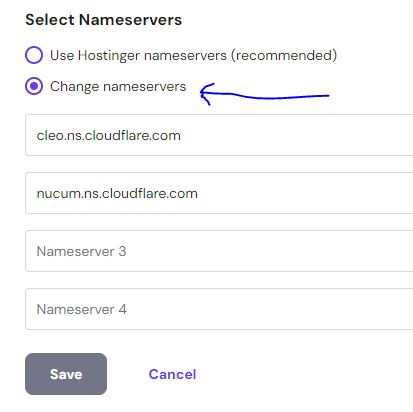
After replacing the nameserver click save.
Hostinger is partnered with Cloudflare. If you want to use Cloudflare DNS service you don’t have to change nameserver as Hostinger already using it. You are good to go without changing nameserver if your domain register and hosting is Hostinger.
Situation 2: Domain and Hosting in Different Register
If your domain is in one register and hosting in other and your website is active then you have to change the nameserver in domain register panel.
I have a domain in Namecheap and host it in Hostinger. When I setup my website I had to replace nameserver in Namecheap with Hostinger DNS.
Now we are going to use Ezoic, we should point the nameserver to Ezoic.
Step 1: Log in to Namecheap Dashboard > Domain List
Click Manage at the right of your domain like the below picture.
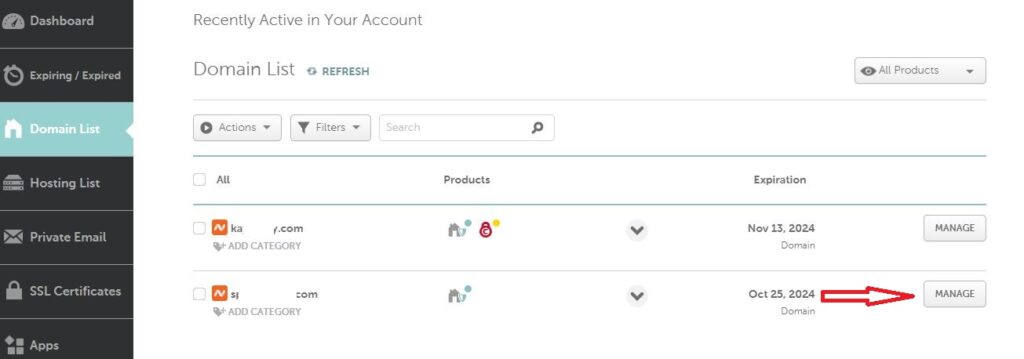
Step 2: Go to Nameservers and Select Custom DNS. Replace the nameserver with Ezoic’s Nameserver and save it.
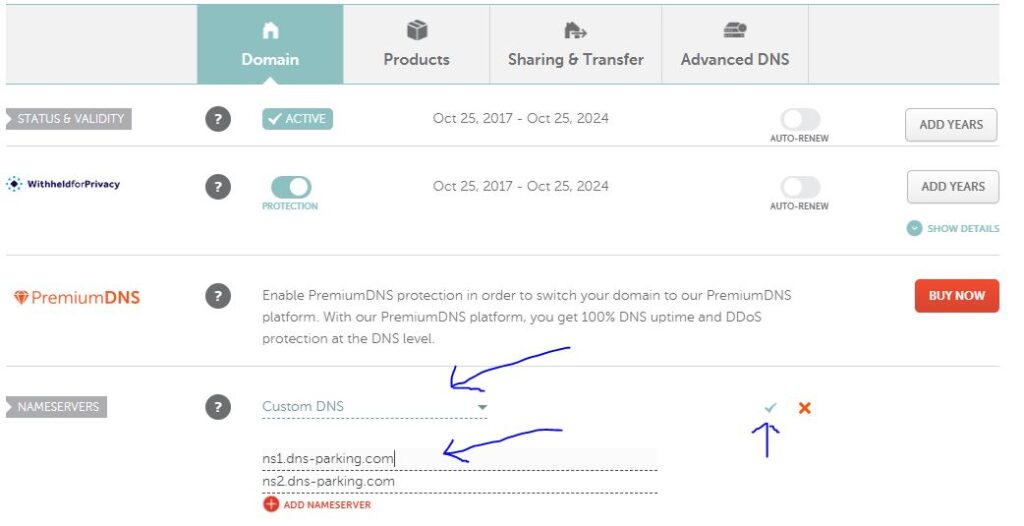
It will take 24 to 48 hours to update the nameserver in Namecheap. But it will affect after few hours even in few minutes. So, if you are in hurry check occasionally.
Situation 3: Domain and Hosting in Different Register and Want to Use Cloudflare
In that case, first you should point your domain to Cloudflare and then point the Ezoic nameserver to avoid any downtime for your website.
Follow the example: I have a domain in Namecheap, I host it in Hostinger and now want to connect with Cloudflare to use their DNS service.
To use Cloudflare for your domain, you will need to sign up for a Cloudflare account and add your domain to it. Cloudflare will then provide you with their nameservers.
You should replace your current nameservers with the Cloudflare ones. Since your domain is with Namecheap, you’ll need to log into your Namecheap account to change the nameservers to those provided by Cloudflare.
Remember to ensure that your DNS records in Cloudflare match the ones you had at Hostinger to avoid any downtime.
Step 1: Sign up to Cloudflare and Login to the dashboard
Step 2: Click Add a Site and input your domain name without www and https. Example: digitaskills.com
Cloudflare will scan existing nameservers and show it to you. Double check the nameservers and match it with Hostinger Nameservers.
Don’t mismatch A record and CNAME record. Follow the images and table for better understanding.
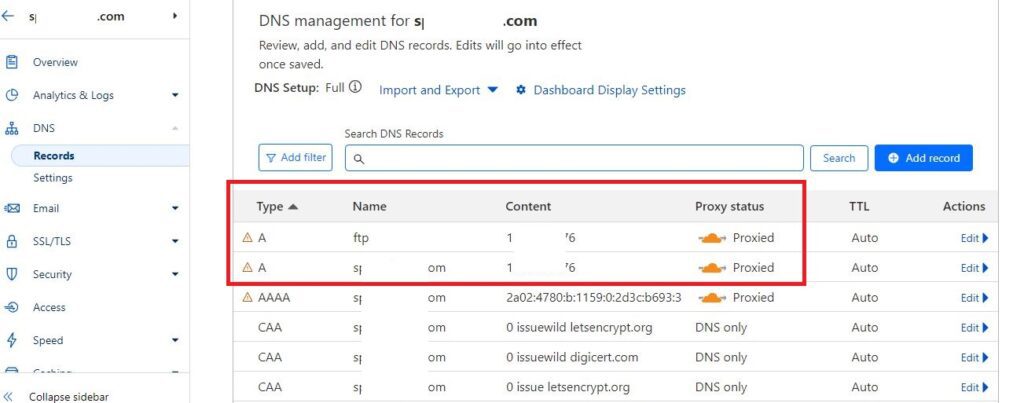

| Type | Name | Content | Proxy Status |
| A | ftp | 114.36.47.86 (IP Address from Hostinger for website) | Proxied |
| A | digitaskill.com (your domain name) | 114.36.47.86 (IP Address from Hostinger for website) | Proxied |
| CNAME | www | digitaskill.com (your domain name) | Proxied |
Step 3: Navigate to Hosting > Plan Details > Website IP Address
This IP address is for your entire hosting plan and for every website under the hosting. If you use other hosting service navigate to their menus and try to find it. If needed ask their support.
After matching it with Hostinger click continue, Coludflare will give you two nameserver like that.
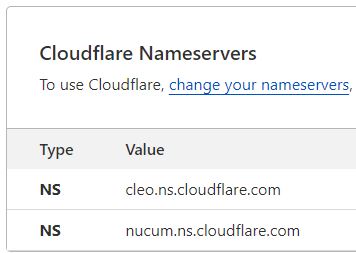
Cloudflare protection for your domain is in a pending state while we verify ownership. This could take up to 24 hours to complete.
You will see it in Cloudflare dashboard.
Step 4: Go to Namecheap Dashboard and Change existing nameservers with the Cloudflare.
After a few hours your domain will be verified using Cloudflare DNS and its time to setup Ezoic Nameserver. From now follow the steps of Situation 2 above to replace the nameservers.


