Is your website showing “Not Secure” in the browser? Don’t worry—you don’t need to buy expensive SSL certificates. You can get a 100% free, lifetime SSL certificate for your WordPress or any type of website using Cloudflare, and in this guide, we’ll walk you through the full process, step-by-step.
[Make sure to watch the video tutorial below for a visual walkthrough!]
What is SSL and Why Do You Need It?
SSL (Secure Sockets Layer) ensures your website is served over HTTPS, which:
- Encrypts data between your server and visitors.
- Increases trust by removing the “Not Secure” warning.
- Boosts your website’s SEO ranking.
- Is required for many modern web features and payment systems.
Steps to Get a Free Lifetime SSL Certificate Using Cloudflare
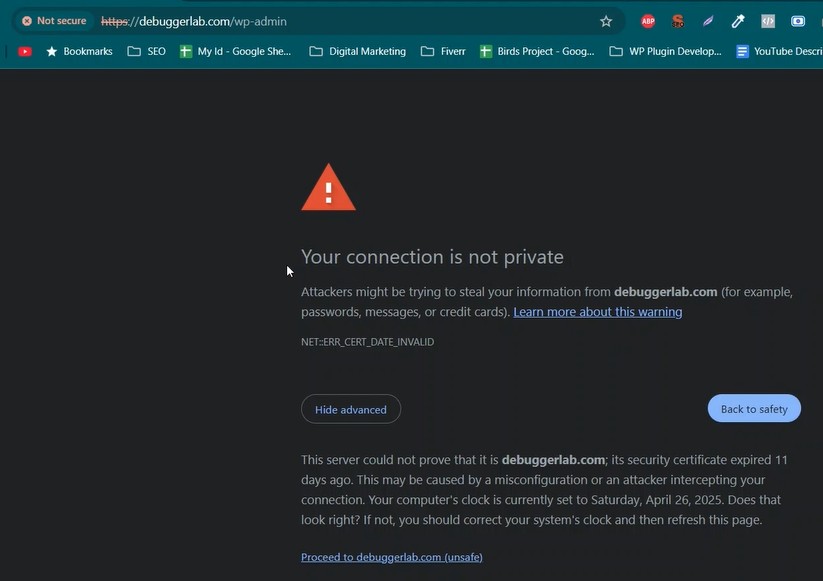
Step 1: Check if Your Website is “Not Secure”
- Visit your website in a browser.
- If it says “Not Secure,” it means SSL is not active yet.

Step 2: Copy Your Domain Name
- Go to your domain (e.g.,
example.com) and copy it.
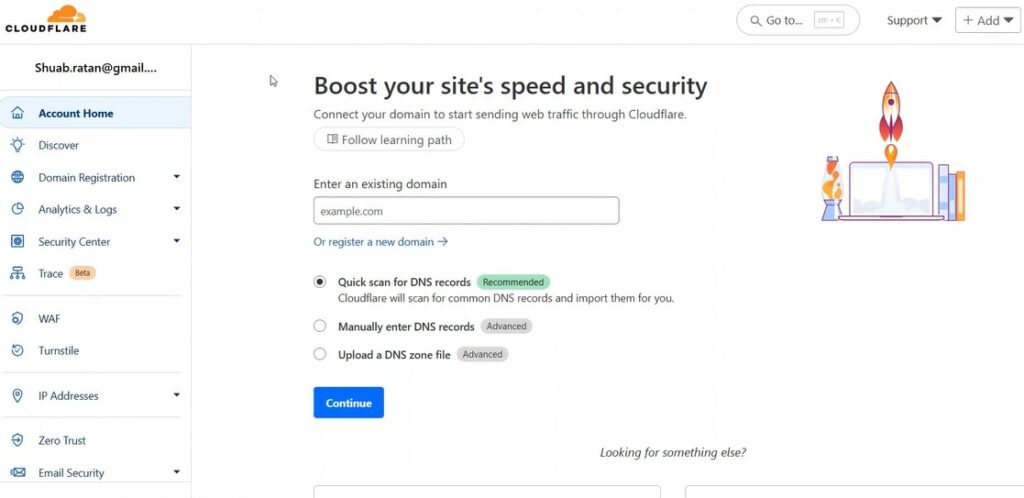
Step 3: Create a Free Account on Cloudflare
- Sign up (it’s free).
- After logging in, click “Add a Site.”
- Paste your domain name.

Step 4: Choose a Plan (Select Free)
- Choose the Free plan and click Continue.
Step 5: Quick DNS Scan and DNS Activation
- Cloudflare will scan your DNS records.
- Click Continue to proceed.
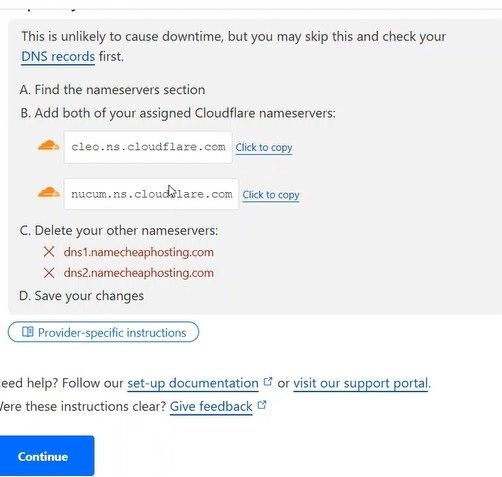
Step 6: Update Your Nameservers
- Cloudflare will now give you two nameservers.
- Copy them.

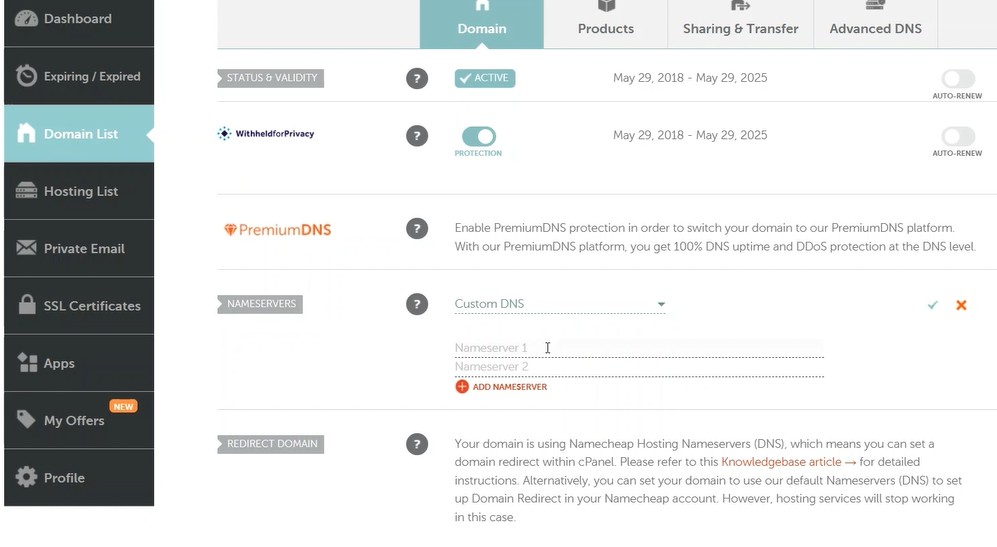
Step 7: Change Nameservers in Your Domain Registrar (Example: Namecheap)
- Go to your domain registrar (like Namecheap).
- Navigate to:
Domain List > Manage > Nameservers - Choose Custom DNS and paste the Cloudflare nameservers.
- Click Save.
Cloudflare says it may take up to 48 hours to update, but usually, it updates within 2–5 minutes.

✅ Step 8: Confirm Activation in Cloudflare
- Go back to Cloudflare and wait for it to detect the new nameservers.
- Once activated, you’ll see the status as Active.
✅ Step 9: Enable SSL in Cloudflare
- In your Cloudflare dashboard, go to: SSL/TLS > Overview
- Make sure Flexible or Full SSL is selected.
- After a few minutes, your website will automatically serve over HTTPS.
✅ Step 10: Check Your Website and Hard Refresh
- Visit your site again.
- It should now show “Secure” with a 🔒 padlock icon.
- If not, try hard refreshing with:
Ctrl + Shift + R

Bonus Tips:
- You can force HTTPS from Cloudflare > SSL/TLS > Edge Certificates > Always Use HTTPS.
- Use Really Simple SSL plugin on WordPress for automatic adjustments (optional).
- Check Cloudflare’s Page Rules to manage caching and redirects if needed.
Why SSL is Important for Any Website
If your website doesn’t use SSL (HTTPS), it not only shows a “Not Secure” warning, but it also risks losing visitors’ trust and being penalized by search engines. Here’s why SSL is absolutely essential:
1. Security
SSL encrypts the data sent between your website and the visitor’s browser. This protects:
- Login credentials
- Contact form info
- Payment details
- Any sensitive data
2. Trust
Visitors are more likely to leave if they see “Not Secure” in the address bar. The 🔒 padlock builds trust.
3. SEO Ranking Boost
Google uses HTTPS as a ranking signal, meaning secure websites have an edge in search results.
4. Required for E-commerce and Payment Gateways
Payment providers like Stripe, PayPal, and SSLCommerz require your site to have a valid SSL certificate.
5. Modern Features Require HTTPS
Progressive Web Apps (PWA), push notifications, and location-based services only work over HTTPS.
Final Thoughts
That’s it! You’ve now successfully installed a lifetime SSL certificate for free using Cloudflare. This method works for WordPress, HTML sites, eCommerce platforms, and more—no matter your hosting provider.
No more “Not Secure” warnings. Just peace of mind and better SEO.
Is Cloudflare SSL really free forever?
Yes. Cloudflare offers a free plan with lifetime SSL, suitable for most websites including blogs, portfolios, and small businesses.
Do I need to install anything on WordPress to use Cloudflare SSL?
No plugin is required, but you may use a plugin like Really Simple SSL to fix mixed content issues easily.
Will this work for non-WordPress websites too?
Absolutely! Cloudflare works with any domain and any type of site—WordPress, custom HTML, Laravel, etc.
Will SSL slow down my website?
No, in fact, Cloudflare can increase your site’s speed by caching and serving assets via its CDN network.
What if my site still shows “Not Secure” after setup?
Try:
Hard refreshing (Ctrl + Shift + R)
Clearing your browser cache
Waiting a few minutes for DNS propagation
Enabling “Always Use HTTPS” in Cloudflare settings
Can I switch from another SSL to Cloudflare?
Yes. You can switch any time. Just point your domain’s nameservers to Cloudflare, and SSL will be handled automatically.


